이번 글에선 openstack 개발 환경 구축을 위한 네트워크 설정에 대해 설명하겠다. (vmware workstation 기준)
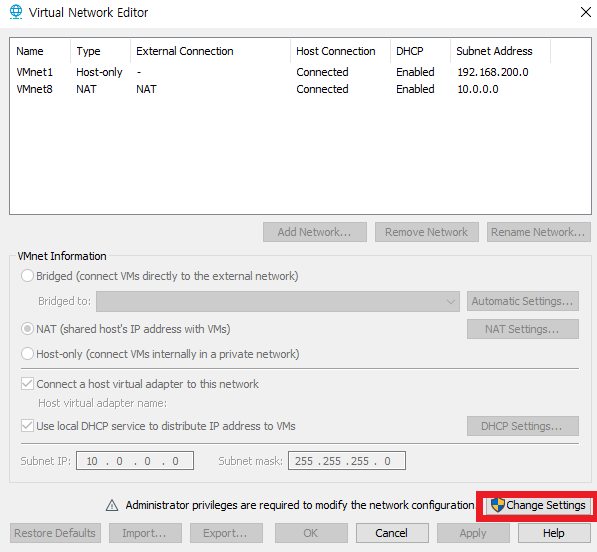
1. Edit -> Virtual Network Editor 클릭

2. Change Settings 클릭
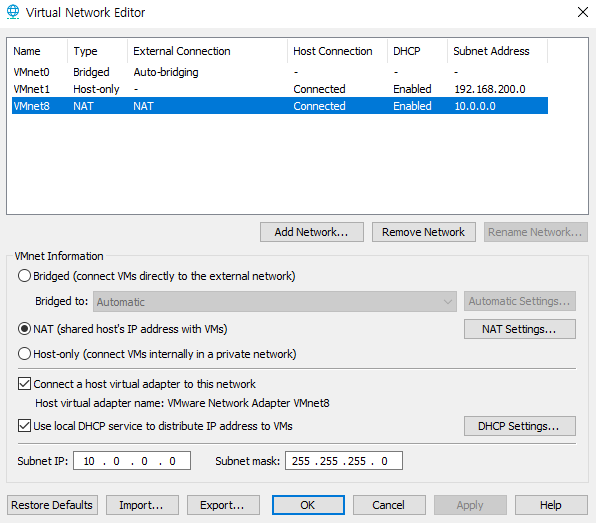
3. VMnet8 Subnet Address 10.0.0.0, Subnet mask 255.255.255.0으로 변경
3. controller, compute1, block1 desktop 생성 OS: ubuntu 18.04.1 desktop, Adapter : NAT
http://old-releases.ubuntu.com/releases/18.04.1/
Index of /releases/18.04.1
Select an image Ubuntu is distributed on two types of images described below. Desktop image The desktop image allows you to try Ubuntu without changing your computer at all, and at your option to install it permanently later. This type of image is what mos
old-releases.ubuntu.com
4. 아래 명령어 그대로 입력
###controller node###
1. sudo su
2. apt upgrade
3. apt install net-tools
4. vi /etc/netplan/01-network-manager-all.yaml (아래 내용으로 수정)
network:
 version: 2
 renderer: networkd
 ethernets:
   ens33:
     dhcp4: no
     dhcp6: no
     addresses: [10.0.0.11/24]
     gateway4: 10.0.0.1
     nameservers:
       addresses: [8.8.8.8,8.8.4.4]
:wq

5. netplan apply

6. vi /etc/hosts (아래 내용 추가)
10.0.0.11 controller
10.0.0.31 compute1
10.0.0.41 block1
10.0.0.51 object1
10.0.0.52 object2
:wq

###compute1 node###
1. sudo su
2. apt upgrade
3. apt install net-tools
4. vi /etc/netplan/01-network-manager-all.yaml (아래 내용으로 수정)
network:
 version: 2
 renderer: networkd
 ethernets:
   ens:
     dhcp4: no
     dhcp6: no
     addresses: [10.0.0.31/24]
     gateway4: 10.0.0.1
     nameservers:
       addresses: [8.8.8.8,8.8.4.4]
:wq

5. netplan apply

6. vi /etc/hosts (아래 내용 추가)
10.0.0.11 controller
10.0.0.31 compute1
10.0.0.41 block1
10.0.0.51 object1
10.0.0.52 object2
:wq

###block1 node###
1. sudo su
2. apt upgrade
3. apt install net-tools
4. vi /etc/netplan/01-network-manager-all.yaml (아래 내용으로 수정)
network:
 version: 2
 renderer: networkd
 ethernets:
   ens33:
     dhcp4: no
     dhcp6: no
     addresses: [10.0.0.41/24]
     gateway4: 10.0.0.1
     nameservers:
       addresses: [8.8.8.8,8.8.4.4]
:wq

5. netplan apply

6. vi /etc/hosts (아래 내용 추가)
10.0.0.11 controller
10.0.0.31 compute1
10.0.0.41 block1
10.0.0.51 object1
10.0.0.52 object2
:wq
5. ping test
###controller node###
1. ping google.com
2. ping compute1

###compute1 node###
1. ping google.com
2. ping controller
정상적으로 통신되면 환경설정 완료
trouble shooting
1. Unable to lock the administration directory (/var/lib/dpkg/), is another process using it? 오류
rm /var/cache/apt/archives/lock
rm /var/lib/dpkg/lock
2. ping test 오류시
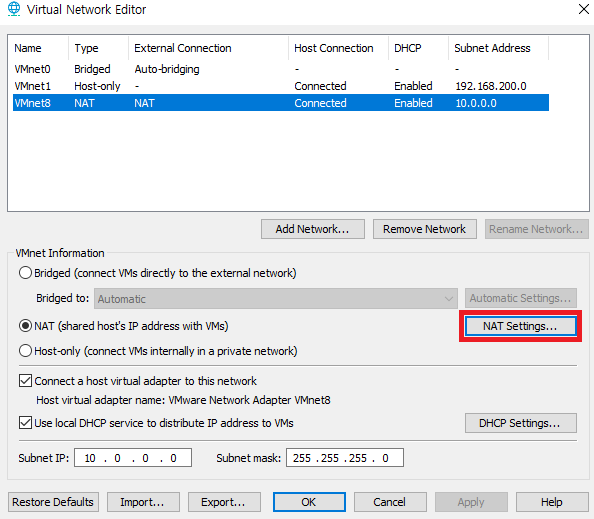
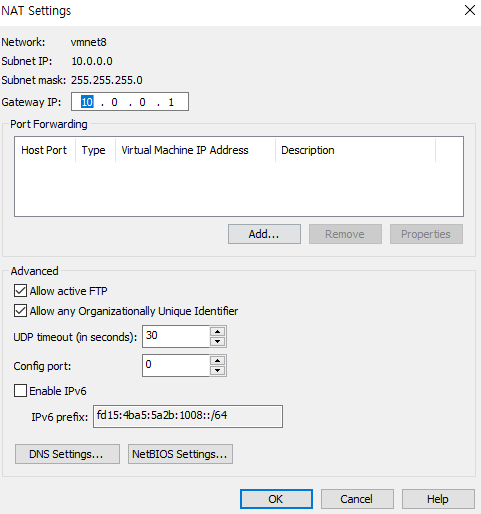
2-(1) NAT Settings 클릭
2-(2) Gateway 10.0.0.1로 변경
'category > Openstack' 카테고리의 다른 글
| openstack-3 (1) | 2023.04.06 |
|---|---|
| openstack-1 (1) | 2023.03.30 |


댓글